Creating a Vignette in CorelDRAW
If you're looking for a more sophisticated look when cropping and engraving photos, consider a vignette - a cropping technique that produces a soft, feathered edge that is very appealing.
In order to create a vignette, it is necessary crop the image first. When cropping a photo in PhotoPaint or PLP (PhotoLaser Plus) many users become frustrated because it’s difficult, if not impossible, to get the correct size and shape that’s desired. Because of this difficulty, these instructions will show an alternate method of cropping in CorelDRAW that is easy to perform as well as being very precise.
The Place Inside Container tool in CorelDRAW allows a photo to be cropped very precisely.
1. To define the area to be cropped, first you must import a photo into Corel and then create an ellipse (or any other shape). Use the sizing handles to adjust the ellipse to the desired size and shape.
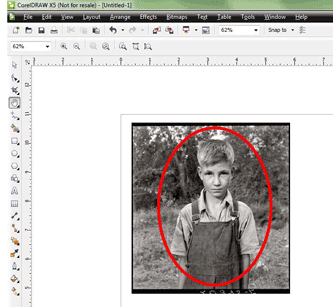
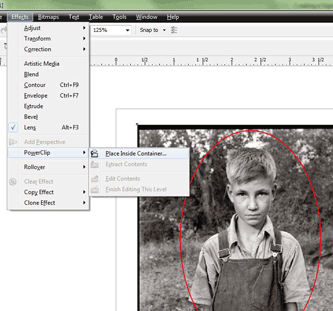
2. Next, select the photo, go to Effects | PowerClip | Place Inside Container (bottom left image).
Click on the container (the ellipse in our example) with the large Place Inside Container arrow tool and the photo is then perfectly cropped to a precise size and shape (bottom right.)
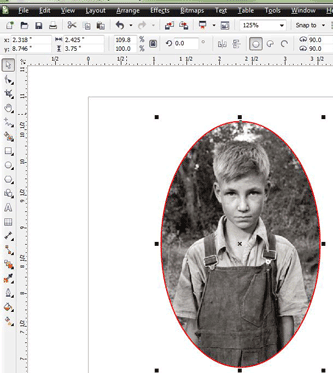
Once the photo has been cropped it is no longer a bitmap image, which is necessary to create a vignette. Luckily, it’s easy to convert the PowerClip image into a bitmap.
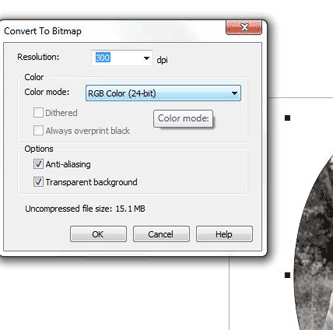
3. With the image selected, go to Bitmaps | Convert to Bitmap and convert to an RGB Bitmap. While in the Convert to Bitmap window, make sure the resolution is set to the value needed for engraving. This image is going to be engraved onto black marble so the resolution needs to be 300 DPI.
Now that we know how to crop a photo and get it back to a bitmap format we can move ahead with creating a vignette.
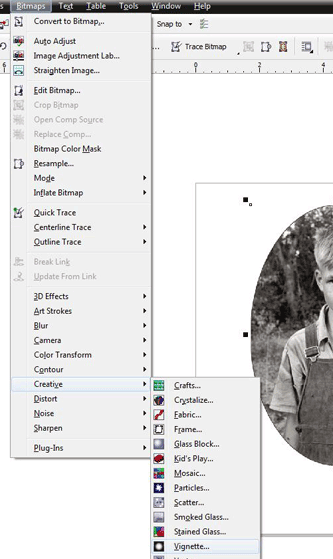
4. In CorelDRAW, with the cropped photo selected, go to Bitmaps | Creative | Vignette.
5. The Vignette adjustment window allows you to set the amount of Offset the vignette will cover and the amount of fade. Values close to 95 for Offset and about 20 for Fade are used in this example.
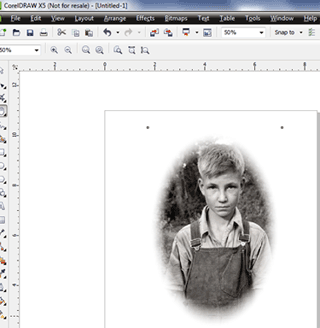
At this point, the Vignette is complete and can be engraved. Keep in mind that depending on the photo processing software you're using, you may need to save the vignette as a different file type before you can engrave it. For example, if you are using PhotoLaser Plus processing software, you'll need to save your vignette as a .bmp or .jpg prior to importing it.
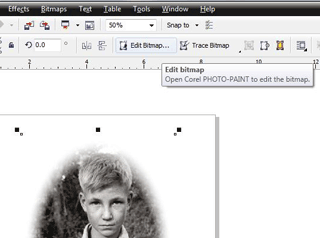
There are several ways to save the image as a .bmp or .jpg but the one that seems easiest for most users is to select the image and then click on the Edit Bitmap option in the Corel Property Bar.
The Edit Bitmap function will open the image in Corel PhotoPaint and it can be saved from there.
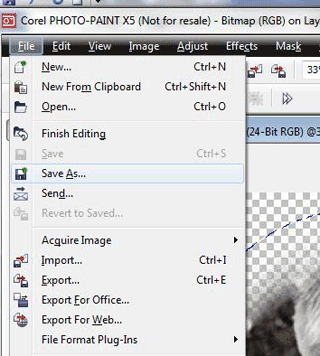
Go to File | Save as. Save the image as either a .bmp or .jpg.
The file is now ready to be imported into PhotoLaser Plus.
