Checking the Auto Focus Plunger Assembly
This guide will walk you through troubleshooting common problems when dealing with the Auto Focus feature.
The Auto Focus Plunger is a tool the machine uses to focus the laser automatically.
Below are troubleshooting and maintenance guidelines that will help you keep your Automatic Focus working properly:
- Table will not go up: If you are having this problem, the Auto Focus Plunger may be stuck in the 'UP' position. If that is the case please see below for instructions on checking the Auto Focus Plunger Assembly.
- Table Continues going down: If you are having this problem it may be because the table pushed the Auto Focus Plunger up with it was raised - please follow the steps to check the Auto Focus Plunger listed below.
- Table stuck in the up position: This problem is typically easy to fix. The table has probably gotten stuck while coming up and is hanging up on the focus plunger assembly.
- First, shut off machine.
- Locate where the table is stuck (more than likely it will be stuck on the spring tip on the plunger assembly itself)
- Remove the table from the spring.
- If spring is stretched a new one will have to be purchased by calling the Technical Support line at 303-215-9171.
- Once table and plunger assembly have been separated make sure plunger is in good working condition. If it is, continue with engraving, if not please see below and follow the Checking the Auto Focus Plunger Assembly instructions.
Checking the Auto Focus Plunger Assembly
- Move the bar to the center of the table where it can be easily reached
- Remove the blue cover on the x-axis I-beam (screws will need to be loosened, but you will not need to remove them entirely.)
- Look underneath the I-beam and locate the Auto Focus Plunger
- Once you have located the plunger, grasp the main tube and try to move it in and up and down motion.
- Be careful not to grab the tip of the plunger, as that will stretch and possibly remove the spring located inside it.
- Clean any dust, debris from the Auto Focus Plunger, looking for any broken, missing or bent parts.
- Replace the cover and tighten the screws.
Following these steps should return the machine to normal operation. Once all the steps have been completed check and see if the table will stop as the desired focus range. If the plunger does not return freely to its rest position it may be necessary to clean the plunger shaft. Follow these steps:
- Locate the top of the auto focus plunger assembly - this will be directly in front of the linear encoder reader. It is a small black plastic piece with a small Allen screw holding it in place.
- Remove the Allen screw and then remove the Auto Focus Plunger.
- Clean the top of the Auto Focus Assembly, getting rid of any debris, dust, etc.
- Reinstall the plunger, ensuring that the magnet faces the back of the machine.
This cleaning should restore the Auto Focus Plunger to its normal operation.
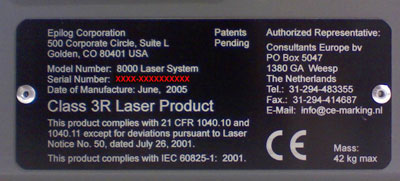
If you find you need a new spring or other part, please call our technical support line at 303-215-9171. If possible, please have your equipment serial number handy – you can find it on the back left hand side of the engraver on a black plate that looks like the one below.