How do I Print Only on a Mac using Preview, Discus or Photoshop?
From Preview:
Click for a Flash Tutorial or see below.
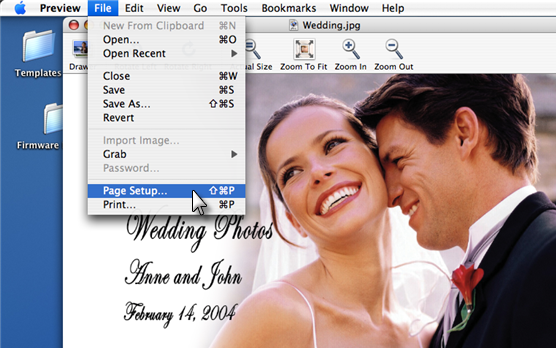
You can print virtually any image file from Mac Preview. Mac Preview is installed on every Mac by default in the Applications directory. Preview launches automatically when you double click on an image file located on the Mac.
1. Once the image is open, go to the File menu, choose Page Setup.
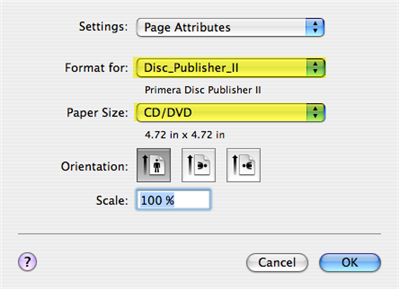
2. Select Format for: Disc Publisher II or Disc Publisher Pro. Select Paper Size: CD/DVD or other available formats for business cards. Click OK.
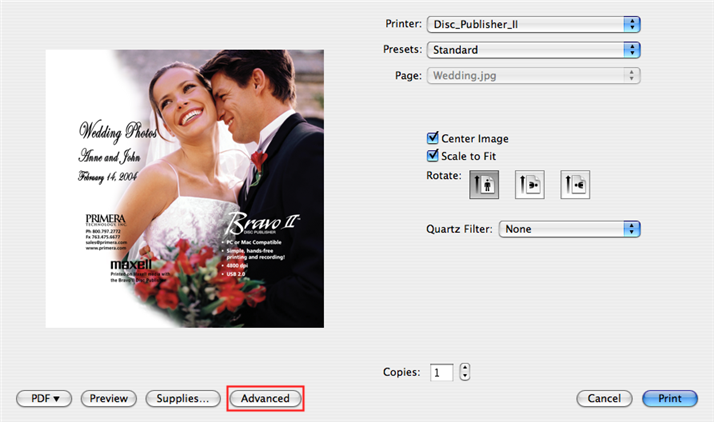
3. Go to the File menu, choose Print. The following screen will appear in OS 10.3 or 10.4. (In OS 10.2 skip to step 4) Click the Advanced button to toggle print settings or choose the number of copies and simply click Print to print the file.
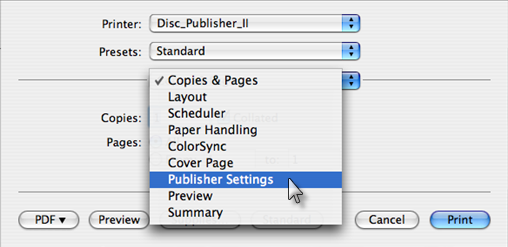
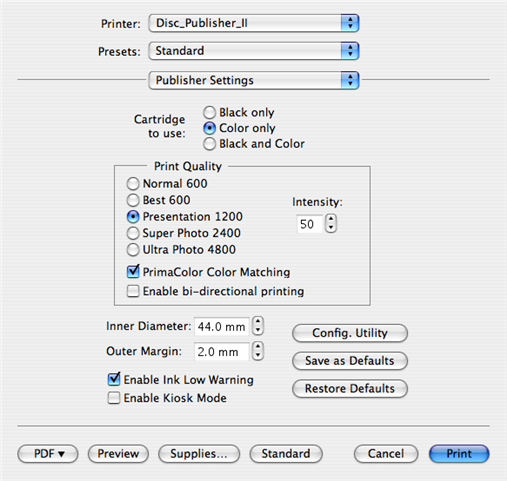
4. If you have chosen to toggle print settings the following screen will appear. Click on the Copies and Pages drop down arrow to select Publisher Settings.
5. Change your print settings. Click Print.
From Discus 2.72: (Click here for additional notes about printing from Discus 3.x or greater)
Discus is a popular disc face design software that works with the Bravo or Bravo Pro.
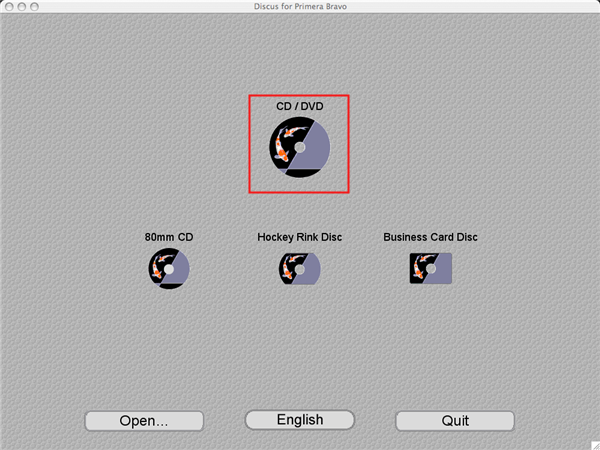
1. Open the program, Select the template size from the available options.
2. Design your image using the Canvas, Paint, Photo and Text Tabs at the top of the screen. When you are ready to print, go to the File Menu, select Page Setup.
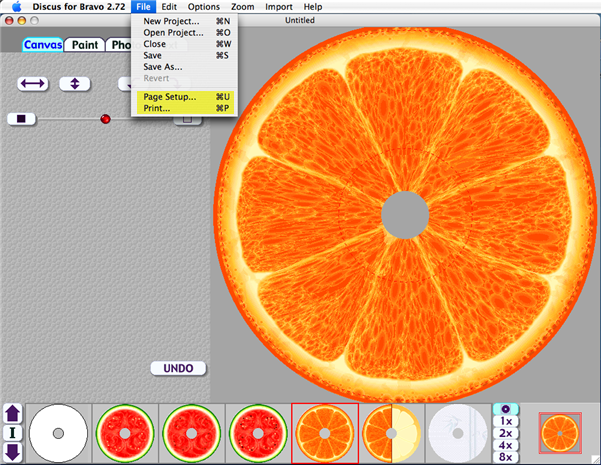
3. Select Format for: Disc Publisher II or Disc Publisher Pro. Select Paper Size: CD/DVD or other available formats for business cards. Click OK.

4. Now go to the File Menu, select Print. To change print settings click on the Copies and Pages drop down menu, click Publisher Settings. If you do not want to change settings, choose the number of copies and click Print.

From Photoshop:
Using Photoshop you can design an image to print on the Bravo or print directly to the Bravo. Follow these guidelines.
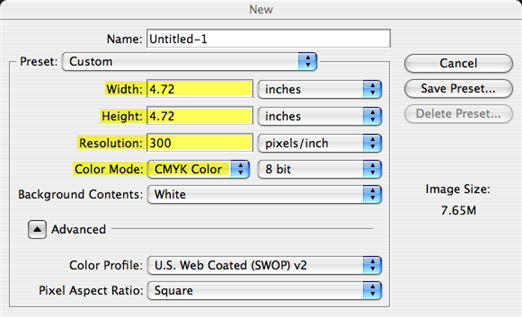
1. If you are creating a new image go to the File menu, choose New. Use the settings shown below:
- 4.72" x 4.72"
- 300 dpi
- CMYK
- Cropping of the outer or inner circle is not necessary or recommended.
2. When you are ready to Print, go to the File menu, choose Page Setup.
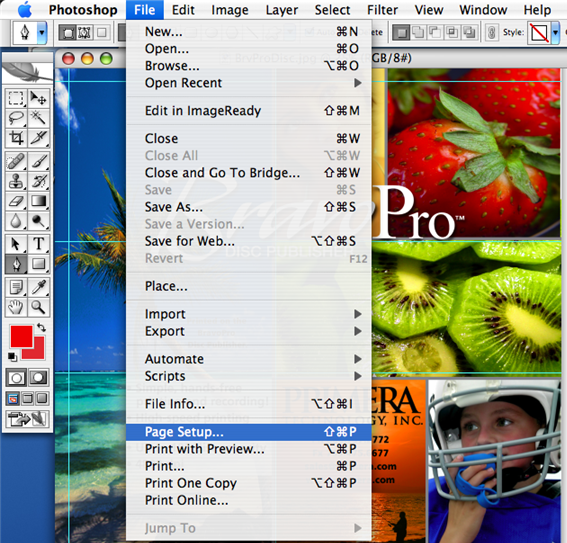
3. Select Format for: Disc Publisher II or Disc Publisher Pro. Select Paper Size: CD/DVD or other available formats for business cards. Click OK.

4. Now go to the File Menu, select Print. To change print settings click on the Copies and Pages drop down menu, click Publisher Settings. If you do not want to change settings, choose the number of copies and click Print.
