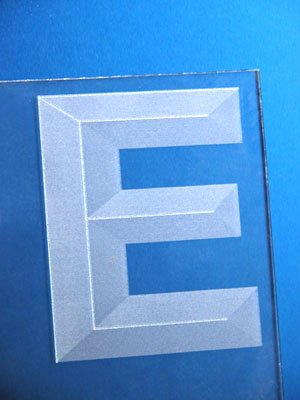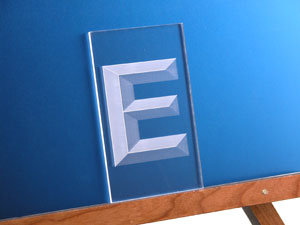
1) This 3-D effect will work for any block style font and many other types of shapes, but for this exercise we are going to apply the effect to the letter "E".
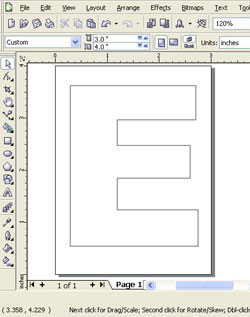
Start with a capital letter "E" to the specifications below.
- Font: Arial Black
- Size: 310 pt
- Convert to Curves
- No fill
- Hairline: Outline
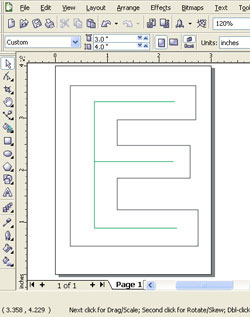
2) Note: Before starting this step go to the "Snap to Objects Setup" in the View menu and be sure that there is a check mark in the box next to "Nodes". Then turn on "Snap to Objects" in the View menu.
Start by creating a new layer and naming it "center line"
Choose the "Freehand Tool" and while holding the "Ctrl" key draw straight lines down the center of the "E" as shown to the left. Be sure that each of the lines are touching each other or are connected.
3) Create a new layer and name it "connecting lines"
Using the red lines pictured to the right as a guide and with the "Freehand Tool" still selected, draw a line from each corner of the E to the closest point on the green line.
The lines that you have created so far will be a guide for tracing the shapes outlined in the next step.
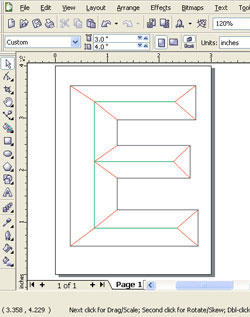
4) Create a new layer and name it "outlines".
In the "Object Manager" turn off all the other layers. This will make it easier to trace the other layers.
Start by selecting a new outline color (any color is fine) and choosing white as the fill color, this will allow you to keep track of which shapes you have already outlined.
Using the "Pen Tool" trace each of the shapes. Be sure that each shape you trace is a closed shape or you will not be able to fill the shape using the directions in the next step.
Note: Before proceeding with step five select all of the shapes using the "Pick Tool" and change the outline color to "None"

5) Using the picture below as a guide, fill each of the shapes in the "outline" layer with the corresponding shade of black.
- RED: 80% black
- YELLOW: 90% black
- GREEN: 30% black
- BLUE: 20% black

6) Start by creating a new later named "highlights"
In the last step we are going to add highlights to the engraving using Vector lines.
Using the red lines to the right as a guide, draw hairlines along the edges of the shapes using the "Pen Tool"
Note: Before printing to the laser turn off all the layers accept for the "outline" and "highlights" layers in the "Object Manager" palette. Do this by clicking the "Enable or Disable" print icon located next to each layer.
Finally, print the file to the laser using the settings for acrylic or glass, depending on which material you are using.

This 3D image on acrylic was engraved on a 35 watt Helix at 100% speed, 55% power for engraving and 100% speed, 16% power, 500 frequency for vectoring.

This 3D image on glass was engraved on a 35 watt Helix at 50% speed, 100% power for engraving and 100% speed, 10% power, 500 frequency for vectoring.
