Saving Configuration Settings in the Epilog Laser Dashboard
Did you know you can save your most common laser engraving/cutting speed and power configurations through Epilog's Laser Dashboard™? The “Configurations” feature is a data management tool that saves all of your Dashboard settings for individual jobs. Saving the Dashboard settings as a database file (.dat) allows you to retrieve the job parameters at a later time, saving you the trouble of trying to remember what speed and power and other settings you used on a job you did in the past. All of your settings can all be permanently stored! Here we'll show you how.
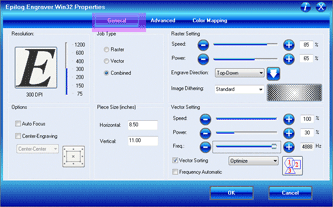
First, set all of the desired settings (Speed, Power, Piece Size, Color Mapping values, etc. for a particular job.
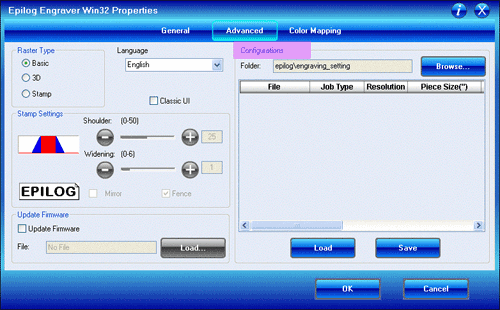
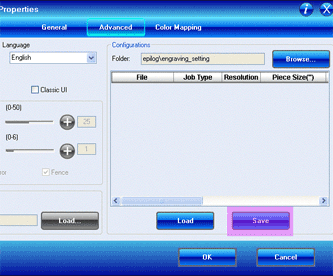
To save the Dashboard settings and identify them with a name, go to the advanced tab and click on Save.
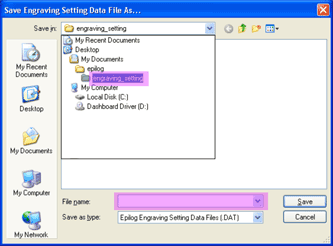
The Dashboard uses standard Windows file protocol to save the configuration files.
When you installed the Epilog Dashboard there was a dedicated configurations folder created where you will need to save the configurations.
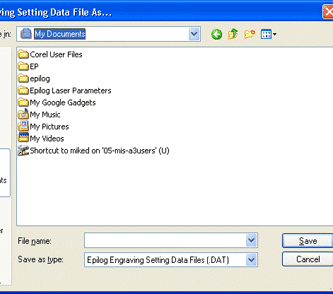
The path for the Configurations folder is shown here:
My Documents|Epilog|engraving_setting.
Give your file a name and then click on Save. You now have a custom configuration file that can be used the next time you need to run this job or material.
Many users find it helpful to save the configurations with a name that associates the configurations with one of two things:
The customer (i.e. jones_pharmacy_awards_banquet.dat)
--OR--
The material size and type (i.e. 9x12_wood.dat).
If you would like to expand your folder options it is best to make changes from Windows Explorer. You can create as many folders under the “engraving_setting” folder as you wish and structure your saved configuration files in a way that best suits your needs.
Additionally, Epilog provides a database of configuration files on the Epilog Dashboard Drivers and Documents disk that you used to load the Dashboard onto your computer.
These files can be used and organized just like the configuration files you create yourself.
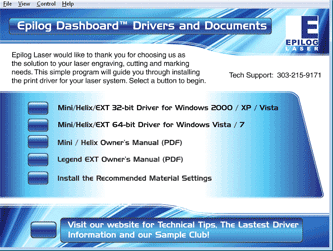
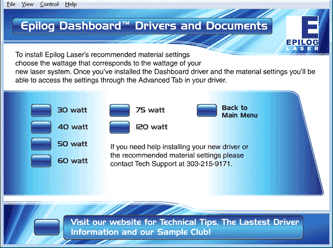
After clicking the Install button, you can select the files that match the wattage of your laser.
To load a configuration file, click on the Browse button.
The Browse For Folder window will open.
Click OK.
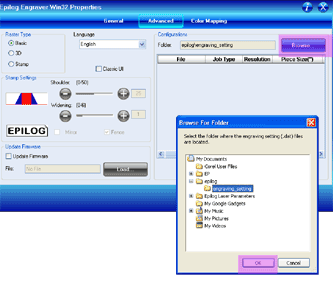
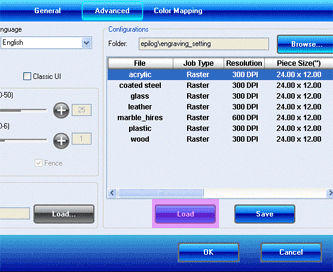
After selecting your folder all of the configuration files will now show in the Dashboard.
The individual files will not appear in the Browse window. They only appear in the Configurations window after the folder has been selected.
Highlight the configuration file that you want to use. You must click on the Load button.
Double clicking on the selected file will not load the settings.
Click on the General tab to see the settings that the loaded file brings up.
