Power Supply Replacement (IPXQ) on the Epilog Mini
Machine Types: Epilog Mini 18/24
Tools Needed:
- Philips Head Screw Driver
- 5/16 nut driver
- Wire Cutters
Equipment:
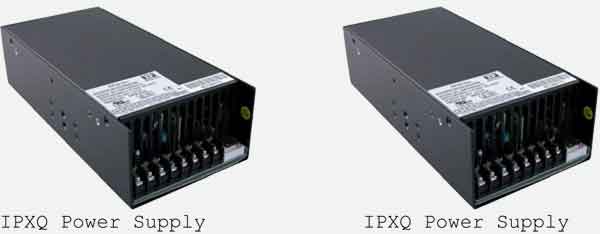
Intro:
This procedure details steps to replacing the IPXQ power supply in the Legend Mini 18 and 24. Before starting on this procedure, unplug the power cord from the machine.
Procedure:
- Remove back service panel.
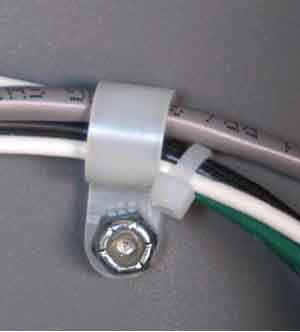
- Remove the four p-loops with a 5/16 nut driver.
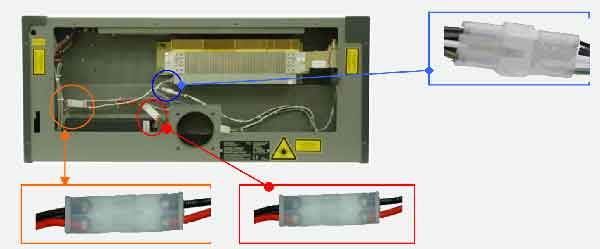
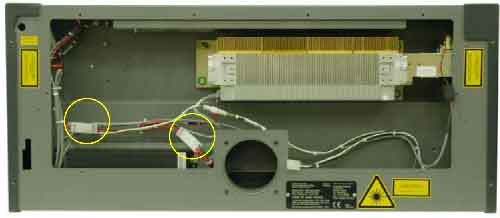
- Disconnect three of the electrical leads.
a. Disconnect the connectors holding the green with yellow stripe, black, and white lead.
b. Disconnect the farthest left connector holding the black and red lead
c. Disconnect the connector holding red and black lead. This connector is directly under the left edge of the laser tube.
Note: There is a black and red lead in the top left of the machine. Do not disconnect this lead. Only three leads should be disconnected for this procedure.
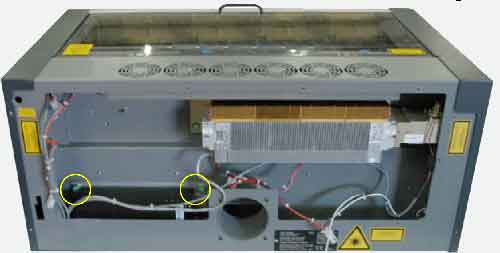
- With a Philips head screw driver, unscrew the green screws located on each side of the power supply.
- Replace the IXPQ battery with a new IXPQ battery. The new battery is identical to the old battery. Therefore, sit the battery just like the old battery, with the green captive screws on top.
- Screw in the green captive screws.
- Reconnect the connector with the green with yellow stripe, black, and white lead. There are two leads containing these wires, connect only the longer of the two.

- Reconnect the two connectors holding the red and black leads. The longer of the leads goes to the farthest left connector. The shorter lead connects to the lead from the laser tube.
- Tuck the wires into the machine and replace the back service panel.
If you have any questions, please contact Epilog’s Technical Support
Phone 303.215.9171
Fax 303.531.7594
E-Mail tech@epiloglaser.com