Creating an Applique with the Laser
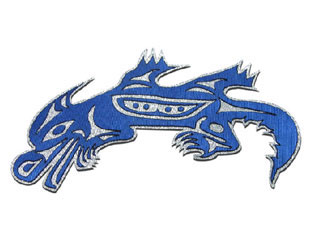
With a few easy steps you can create your own custom cut appliqué out of two-ply twills! Follow these instructions to see how we've taken a piece of clipart and optimized it to create this stunning design!
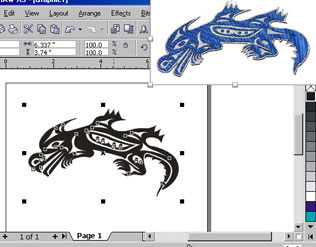
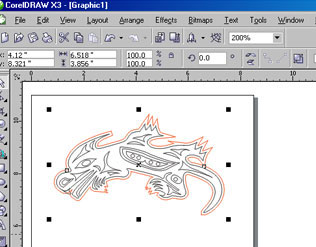
First, ungroup the entire image. Next, we need to add an outline around the outside of the image. This will be the line that cuts through both the blue and silver layers of the fabric. We'll use the Interactive Contour Tool to automatically create the outline for us.
With the outer most lines of the image selected, click on the Interactive Contour Tool in the tool bar.
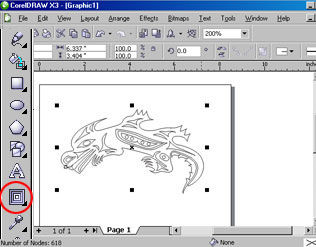
At the top of the page you can change the settings for the Interactive Contour Tool. We want to tell it to create the contour line on the outside of our image, so select the Outside Contour Line button.
Also set how far away from the image to create the outline. We want it to have an offset of .09", so type .09 in the Contour Offset box and press enter.
Now we have a line around our image positioned .09" away from our original.
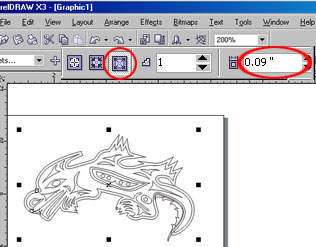
The Contour Tool automatically links the two lines together. We need to separate the two lines so we can tell the laser to cut through both layers of fabric on the outer line and just one layer for the inner line. Click on Arrange in the tool bar at the top of the page and select Break Contour Group Apart.
Now that the two lines are separated, we need to set up our color mapping so that the laser knows which line to cut through both layers and which to cut through only one layer. Change the outer line to red to show that it cuts through both layers.
Print the project to the laser and set printer properties, but do not set your speed and power. You will do this in the color mapping window.
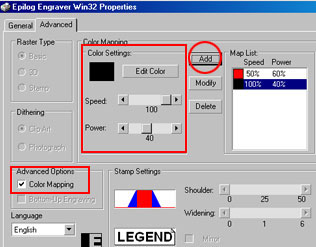
Click on the Advanced tab and click the box next to Color Mapping under Advanced Options. Under Color Settings, click the Edit Color button. Choose the black color swatch (r:0, g:0, b:0) and set the speed and power associated with black lines to a setting that will only cut through one layer of fabric. On a 35 watt Helix we used 100% speed and 40% power.
Repeat the process by choosing the red swatch (r:255, g:0, b:0), and set the speed and power associated with red lines to a setting that will cut through both layers of fabric. On the 35 watt we used 50% speed and 60% power.
Start the job at the laser and weed away the parts of the blue fabric where you want silver to show through.
When cut out of a two-ply twill, you can create amazingly intricate appliqués out of fabric. The edge of the fabric will be seared by the laser, so there is no fraying!
Now try it out with your own favorite clipart images!
